
 07584 319522
How to Remove Moss from Roof Tiles Without Causing Damage
Last Updated: November 5, 2026
Quick Summary
To remove moss from roof tiles, brush the dry growth off with a long-handled stiff brush and clear the joints with a plastic scraper, then apply a purpose-made moss treatment. Work top-down on a dry day and never use a metal blade or bleach, which damages tiles and fixings.
- Act in late spring or early autumn, on a dry day, before growth spreads.
- Work top-down from the ridge, brushing first and scraping joints with plastic only.
- Use a soft brush on clay and slate; never walk on slate at all.
- Most moss treatments need two to four weeks before dead moss is brushed away.
- Never lean a ladder against the gutter and reach across, which bends gutters and cracks tiles.
Table of Contents
- Why Moss Grows on Roof Tiles and When to Act
- How to Assess Moss Coverage and Roof Condition Before You Start
- Roof Moss Removal Tools and Working-at-Height Safety
- Step-by-Step: Manual Removal with Brushes and Scrapers
- Roof Moss Removal Without Damaging Tiles: Concrete, Clay and Slate
- The Best Moss Killer for Roof Tiles and How to Apply It
- How Long Does Roof Moss Treatment Take to Work?
- Booking a Ladder-Free Roof Clean with JAG Simply Clean
- Frequently Asked Questions
Why Moss Grows on Roof Tiles and When to Act
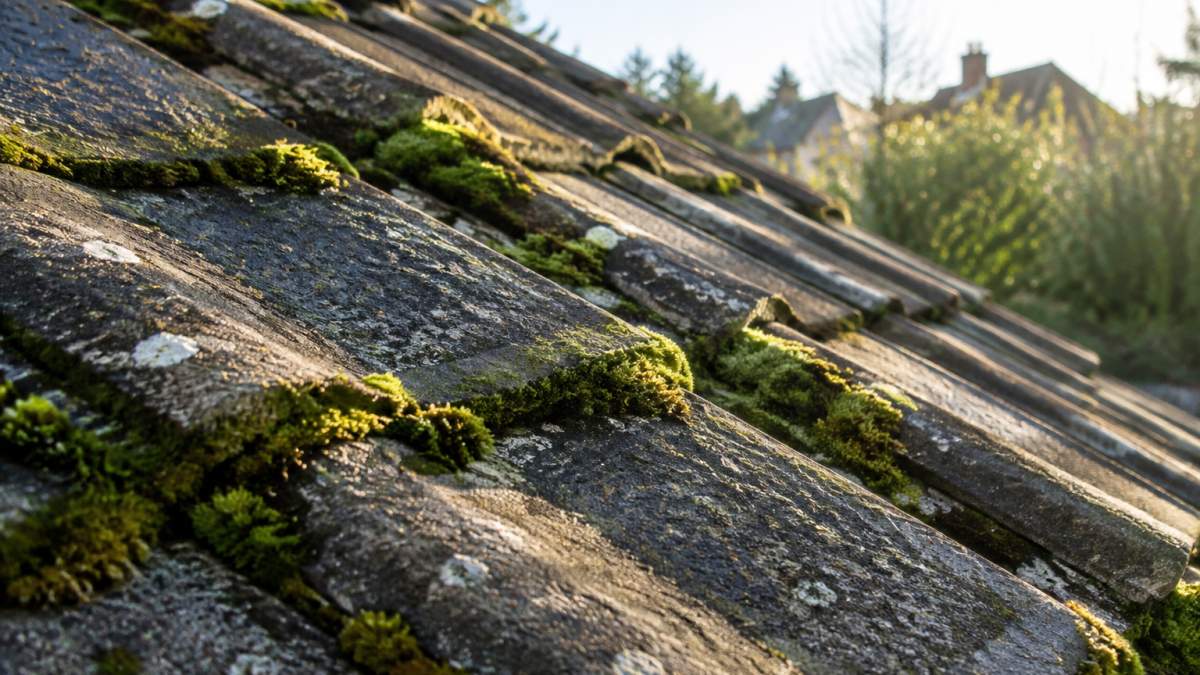
Moss on roof tiles is a sign that moisture is staying on the roof surface long enough for spores to settle and grow. Shaded slopes, north-facing pitches and older concrete tiles hold damp far longer than sunlit areas. That is why one side of a roof can look green while the other stays clean.
This guide from JAG Simply Clean explains how to remove moss from roof tiles without cracking, lifting or breaking the covering. Moss is rarely just a cosmetic problem.
Left alone, moss roots work into the gaps between tiles. It holds water against the surface. Frost then lifts tile edges, and heavy growth can block gutters and downpipes. The Health and Safety Executive guidance on working at height is clear that roof work is high-risk, which is why we plan every job around safe access rather than ladders.
Act in late spring or early autumn, on a dry day, before growth spreads.
How to Assess Moss Coverage and Roof Condition Before You Start
Check the extent of the growth and the state of the tiles before touching anything. A quick survey from the ground with binoculars tells you most of what you need.
Work through this checklist:
- Estimate coverage: a few patches, half the roof, or the whole pitch
- Look for cracked, slipped or dislodged tiles
- Check for sagging, which can point to deeper problems
- Note heavy growth near valleys and gutters
- Confirm the weather is dry with no rain forecast for 24 hours
If you spot cracked tiles or a sagging roof line, stop. Moss in those areas can signal trapped moisture and a wider roofing issue that needs a roofer, not a brush. For a closer look at how organic growth spreads across exterior surfaces, see our guide to preventing organic growth on exterior walls.
Roof Moss Removal Tools and Working-at-Height Safety
The best roof moss removal tools are a long-handled stiff brush, a plastic scraper and a trowel. Add a sprayer for treatment, plus tarpaulins and gutter guards to catch debris.
Safety comes first. Falls from height remain one of the most common causes of serious injury at work, and the HSE’s ladder safety guidance sets out when ladders are and are not appropriate. For roof work, they usually are not.
Our stop-work criteria:
- Wet, frosty or windy conditions: do not go up
- No stable platform or edge protection: do not go up
- Fragile or asbestos roof: never walk on it
- Any doubt about tile condition: call a professional
A common mistake is leaning a ladder against the gutter and reaching across, which can bend gutters and crack tiles.
Step-by-Step: Manual Removal with Brushes and Scrapers
Manual removal avoids the water pressure that can damage tile surfaces.
- Set up below. Lay tarpaulins and fit gutter guards to catch falling debris.
- Work top-down. Start at the ridge and move down the slope.
- Brush first. Use a long-handled stiff brush to loosen dry moss in steady strokes.
- Scrape the joints. Use a plastic scraper or trowel to clear moss from between tiles. Never use a metal blade.
- Clear the gutters. Bag debris as you go so downpipes stay clear.
- Treat afterwards. Apply a moss treatment to the cleaned surface.
Watch out: scraping too hard lifts tile edges and breaks the seal between courses. Light, repeated passes beat one aggressive scrape. For a look at what a proper clean achieves, see our roof soft washing project in Milton Keynes.
Roof Moss Removal Without Damaging Tiles: Concrete, Clay and Slate
Different tiles need different handling. The same stiff brush that is fine on a modern concrete tile can scratch the surface of slate or chip the edge of a clay tile.
Start by identifying what you have. From the ground, concrete tiles look uniform and granular, often with a sandy texture where the surface has weathered. Clay tiles vary in colour across the roof and may be plain, pantile or interlocking.
| Tile type | Best approach | Main risk | What to check first |
|---|---|---|---|
| Concrete (interlocking) | Stiff brush and plastic scraper | Cracked edges from force; granule loss on old tiles | Hairline cracks along the interlock; tiles that flex underfoot |
| Concrete (plain) | Stiff brush, lighter pressure | Lifting at the headlap; water tracking under courses | Displaced tiles and failed mortar at the verge |
| Clay (plain or pantile) | Soft-bristled brush, hand removal at joints | Breakage from foot traffic; chipped nibs | Cracks at the nibs and any previous repairs |
| Slate | Soft brush, minimal contact, no walking | Delamination and flaking; nail fatigue | Loose slates, rusted or popped nails, uneven courses |
Concrete tiles are the toughest and handle a stiff brush well, but age matters. Older tiles can have a weakened surface layer, and a stiff brush on a cold morning can lift granules. Work in mild, dry conditions and use light, repeated passes rather than one heavy scrub.
Clay tiles are more brittle and chip easily, particularly at the nibs where they hang on the batten. Plain clay tiles also overlap more tightly than interlocking concrete, so moss tends to sit in the lap rather than on the face.
Slate is the most delicate covering. It flakes and delaminates, and old slate is often held by nails that have thinned with age. Keep pressure light, avoid walking on the slate at all, and never use a wire brush or scraper.
Watch out: on any roof, moss roots can hide cracked or slipped tiles, so clear a small test patch first and inspect the exposed covering before committing to the whole pitch. If the test patch reveals damage, the job becomes a repair, not a clean.
The Best Moss Killer for Roof Tiles and How to Apply It
The best moss killer for roof tiles is a purpose-made moss treatment applied as a diluted solution, not bleach. Bleach damages tiles, corrodes fixings and harms plants below. Products generally fall into several groups, including concentrated and ready-to-use treatments. Read the label for the active ingredient and the approved use, some products are not suitable for certain tile types or for roofs that drain to a watercourse.
Application steps:
- Mix the product to the label dilution. Never guess, too strong a mix can stain tiles and increase runoff risk.
- Use a garden sprayer with a coarse nozzle for even coverage, and keep the spray pattern low so it does not drift onto plants or into open windows.
- Spray the whole pitch, working downward, so you do not walk through treated areas.
- Keep the spray away from plants, drains and pets. Cover or move pots and furniture below, and keep pets and children off the area until the surface is dry.
- Let it work, then brush away dead moss. Most treatments need two to four weeks, and the moss darkens and loosens before it can be cleared.
Coverage varies by product and surface, so check the label rather than assuming a single bottle treats a whole roof. Rough or heavily mossed surfaces absorb more liquid than smooth, clean tiles, and a second light pass is usually better than one soaking pass.
Household options like white vinegar or a soda solution work on small patches but need repeat applications and are not a substitute for a proper treatment on a full pitch. Whatever you use, protect drainage: rinse gutters and check downpipes afterwards so residue does not reach watercourses. The Environment Agency guidance on pollution prevention explains why runoff matters near drains, and the same logic applies to soakaways and surface-water drains.
Watch out: applying treatment in windy conditions or just before rain wastes the product and increases the chance of drift onto neighbouring plants, ponds and cars. Check the forecast and work on a dry, still day with no rain expected for at least 24 hours.
How Long Does Roof Moss Treatment Take to Work?
Roof moss treatment usually takes two to four weeks to work, depending on weather and growth thickness. The moss darkens, dries and loosens over that period.
Expect a slower result in cool, damp spells and a faster one in dry weather. After the moss dies back, a light brush clears the residue. Regrowth can return without prevention, so a periodic check is sensible.
Booking a Ladder-Free Roof Clean with JAG Simply Clean
Keeping your feet on the ground is a sensible way to approach roof moss. JAG Simply Clean is a family-run team with over 20 years of experience, qualified in soft washing and DOFF steam cleaning, and offers eco-friendly and pet-friendly products.
You can see the full roof cleaning service, check roof cleaning in Milton Keynes for details, or read how to book professional exterior cleaning with confidence if it is your first time.
Frequently Asked Questions
How do you remove moss from roof tiles safely?
Work from a stable platform rather than leaning a ladder against the gutter, and only in dry weather when tiles are not slippery. Use a long-handled stiff brush or plastic scraper to lift moss in downward strokes, working from the ridge towards the eaves. Bag the debris rather than letting it wash into the gutters. If your roof is steep, fragile or more than two storeys, book a professional. JAG Simply Clean is qualified in soft washing and DOFF steam cleaning.
What is the best moss killer for roof tiles?
For most tiled roofs, a purpose-made moss killer applied as a diluted solution through a sprayer gives the most even coverage and the longest-lasting result. Check the label for compatibility with concrete, clay and slate, and keep pets and children off treated areas until the product has dried. White vinegar or a soda solution can shift light green growth but need repeat applications. Whatever you choose, brush off the bulk of the moss first so the treatment reaches the tile surface rather than the moss mat.
Can pressure washing damage roof tiles?
Yes. High water pressure strips the protective surface from concrete tiles, cracks clay and slate, and forces water under overlaps where it can reach the felt and battens. Dislodged tiles and blocked downpipes are common afterwards. Soft washing at low pressure with a suitable cleaning solution removes moss, algae and lichen without that risk. If a contractor offers to power wash your roof, ask what pressure they use and whether they will replace any cracked tiles they cause.
How long does roof moss treatment take to work?
Most moss killers start working within a few days, but full results take longer. Expect the moss to darken and loosen over two to four weeks, with heavier growth taking up to a couple of months before it brushes away cleanly. Regrowth depends on shade, moisture and roof pitch.
Moss will always find a damp, shaded roof. The difference is catching it early and treating it properly, without cracked tiles or blocked gutters. Get started with JAG Simply Clean and book a ladder-free roof clean that protects your tiles and your home.


